Sunday, September 17, 2017

Captain Marvels Step by Step Part 1 Pencils


Part 1 of the Step by Step making of the cover art for Generations The Bravest 1 featuring the Captains! -

PENCILS


COVER SKETCH

The cover concept I sent into Marvel Comics for approval. 
Roughs were drawn at 2" x 3" in my sketchbook using Warm Grey Copics then colored in Photoshop CS3.

INITIAL PENCILS


Drawn in Light Blue on 12" x 18" Bristol Board 


Quickly roughed in the drawing making sure the composition still help.


I draw with Col Erase Light Blue Pencil and Staedtler HB Lead Pencil.


Since I'm happy with my rough in I go to "tight" (ink-able) pencils.


The tracing paper is there to keep the drawing clean while I finish Captain Marv-Ell


Detail


For yucks, pretty close...


Just about done...


And the final pencils, all ready for Rachel Dodson to ink...

Next time, 

PART 2


TD

Thursday, September 14, 2017

Harley's 25th and Captain Marvel's - Out this week from Rachel and I

These covers by Rachel and I are out in stores now.


Generations The Bravest from Marvel Comics


Harley Quinn 25th Anniversary Special

TD

Wednesday, September 13, 2017

Harley Quinn Deluxe Book 1 Step by Step Part 3 Color

Here's the Harley Quinn Deluxe Book 1 Cover Art!

By Rachel Dodson and Me.

Out now from DC Comics.


Now for Part 3 of the Step by Step making of the cover art for Harley Quinn Deluxe Book 1 -

COLOR


FLATS

The first stage of color is called flats - flatting allows me to choose an area to color at any point throughout the coloring process.

I try to adjust the colors to their medium value or imprimatura - I use this as the starting point for the piece. 


INITIAL COLOR (ROUGH IN)

I colored this on my Cintiq 22 HD using Photoshop CS3 .

Here I rough in quickly all the medium lights and darks on the figures and cast initial shadows.

Using the Pencil Tool at 100% to knock those in.

I also used the Gradient tool to give variation form warm red to cool red in Harley's costume.


ADDITIONAL ROUGH IN

I went on the rest of the figure and face and knocked the next lights and darks using the pencils tooling at 70-80%.

I go to the next level of darker darks and lighter lights


COLORING THE LINE ART


This is the icing on the cake step of the process.


I used a previous Harley I colored to "cheat" on the line colors since I already figured it out once...


Just about ready for primetime ...


FINAL COLOR

I added a "Leyendecker" texture to Joker's jacket, more rendering on the fish, a little more rendering on Harley...

And done!

PART 1


PART 2

TD

Tuesday, September 12, 2017

Harley Quinn Deluxe Book 1 Step by Step Part 2 Line Art

Here's the Harley Quinn Deluxe Book 1 Cover Art!

By Rachel Dodson and Me.

Out now from DC Comics.


Now for Part 2 of the Step by Step making of the cover art for Harley Quinn Deluxe Book 1 -

LINE ART


Rachel Dodson inks directly over my original pencil drawing.


Rachel inks with a Windsor Newton Series 7 Kolinsky Sable #2 Brush and Dr. Martens Hi Carb Ink.


Rachel likes to start in the foreground with the main face, this particular time she stared with the Joker and then ...


on to Harley!


Next on the to the background figures, again this all BRUSH!


Here's Rachel inking the in-between of these two pics... over 9 MINUTES of her inking - pay attention!


Almost done...


Catwoman...


Final Art


Artwork is scanned into Photoshop at 800dpi Gray full size. I then go in and convert to Bitmap and clean to prepare for....

Next time, 

PART 3


PART 1


TD

Harley Quinn Deluxe Book 1 Step by Step Part 1 Pencils

Here's the Harley Quinn Deluxe Book 1 Cover Art!

By Rachel Dodson and Me.

Out now from DC Comics.


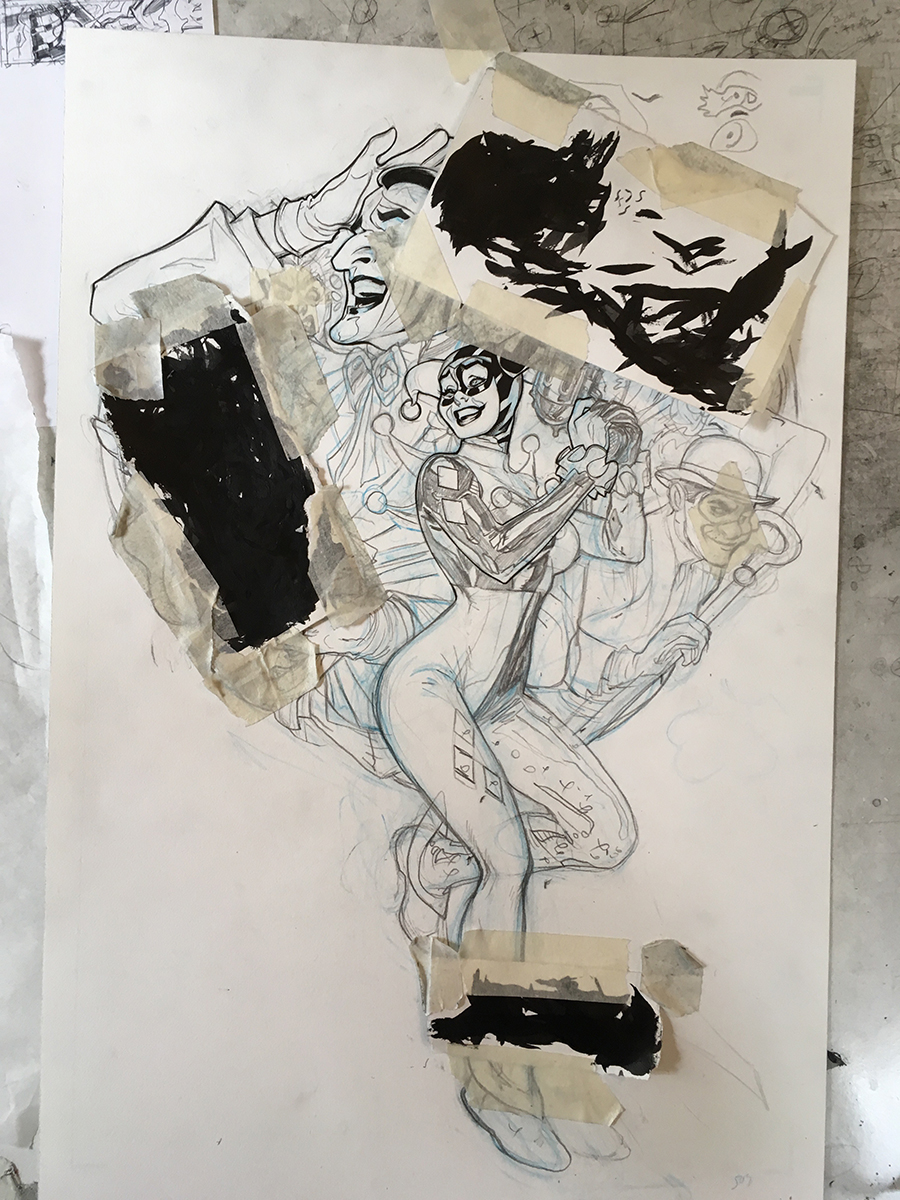
Now for Part 1 of the Step by Step making of the cover art for Harley Quinn Deluxe Book 1 -

PENCILS


COVER SKETCH

The cover concept I sent into DC Comics for approval. I sent in about 10 designs but I'm only showing this one because I'm using the others done the road!

 Total brainstorm on this :-)

Roughs were drawn at 2" x 3" in my sketchbook using Warm Grey Copics then colored in Photoshop CS3.


INITIAL PENCILS


Drawn in Light Blue on 12" x 18" Bristol Board 


Quickly roughed in the drawing making sure the composition still help.


I draw the Harley GUN much bigger now than on the original run - interesting how we change over time!


I printed out my rough in light blue on the paper to ensure the composition was positioned correctly.


This is a nice look at the texture of the paper.


Happy with Harley so move on to Joker!


I know his face well, just had to remember...


His costume, drew wrong a couple of times...


A fish for a gun, why not?


Two Face


Roughing in the rest of the Rogue Gallery - again had to refer to my old work to get the costumes right...


Almost done

FINAL PENCILS


And the scan of the pencils....

Next time, 

PART 2


TD


Friday, September 8, 2017

Star Wars and RED ONE Original Artwork

Galerie 9e Art is selling my Star Wars and Red One original artwork with worldwide shipping.


Visit their website to see the available artwork.


And if you are in Paris, the artwork is up for exhibit at the gallery until September 16.

Galerie 9e Art
4 Rue Crétet
Paris 75009

TD


Thursday, September 7, 2017

Harley, Vader, Diana, Oh My!

Rachel and I have 3 covers coming out this week!


Bombshells United #1 from DC Comics


Darth Vader #5 from Marvel Comics


Harley Quinn Deluxe Book #1

And the Harley Book collects issues 1-8 that we drew.

Step by Steps coming for these soon!

TD

Monday, September 4, 2017

New York Comic Con, October 5-8

I will be at NYCC again, table D-17.


I will be taking a Pre Show Sketch list on September 19, 9 am Pacific Time, stay tuned for updates! Refer to previous blog posts for info for now.


Questions?!

Please ask here!

Thanks!

TD