Showing posts with label Cyclops. Show all posts

Tuesday, February 28, 2017

Cyclops Inhumans Vs X-Men #4 Cover Step by Step Part 3 Color


Inhumans Vs X-Men #4 Variant Covers featuring Scott Summers Cyclops.

By Rachel Dodson and Me.

Out now from Marvel Comics.

Now for Part 3 of the Step by Step -

COLOR


FLATS

The first stage of color is called flats - flatting allows me to choose an area to color at any point throughout the coloring process.

I try to adjust the colors to their medium value or imprimatura - I use this as the starting point for the piece. 


BACKGROUND

First thing I did was to get the background figured out - notice the right side is not completely done but the PATTERN is figured out.


INITIAL COLOR (ROUGH IN)

I colored this on my Cintiq 22 HD using Photoshop CS3 .

Here I rough in quickly all the medium lights and darks on the figures and cast initial shadows.

Using the Pencil Tool at 100% to knock those in.
 

Now, that background is looking better, I used this pattern to do it.


Adding the RED from his beam.


COLORING LINE ART

This is the icing on the cake step of the process.


Fun stuff!


Almost done...


 nailing down the SFX.


FINAL COLOR

And to review-

 PART 1


PART 2


 TD

Thursday, February 23, 2017

Cyclops Inhumans Vs X-Men #4 Cover Step by Step Part 2 Scanning Line Art and Preparing for Color


Rachel Dodson inks the pencil drawing with a Windsor Newton Series 7 Kolinsky Sable #2 Brush and Dr. Martens Hi Carb Ink. 

Now, time to scan - Rachel's art is full of very fine lines and grays and details that may get lost in a traditional scan, so this is how we do it - mucho gracias to Alex Sinclair for telling me about this!


Step 1

 I set the art on my full size Epson 11000XL scanner and using the Epson scanning software in Photoshop, scan the art full size at 800dpi in the gray scale setting.


Step 2

 It will look something like this. Now Crop the art and Save as FILE_800ms.tif


Step 3 


I then go through and Lasso the whites, thin whites, white out corrections, little tiny greys formed by crosshatching and use Tolerance set to about 90 to "save" those white areas from disappearing into blacks.


Step 4

I then use the Burn set to 100%...


 and darken up the light lines- 


especially feather lines of Rachel's brushes.


Step 5

Once I am satisfied I'm saved my white lines/areas and the lightest lines, I set the Tolerance of the entire artwork at 128 - I double check by hitting undo/redo a couple of times. 


Step 6

Then I convert from Grayscale to Bitmap. 

and Save.


Step 7

I then clean the art at 25% as I color myself - 

if this is for someone else to color, then 50%.

I use the Pencil tool and/or the Line tool set to WHITE at 100%.


Step 8

 Save.


Step 9

Now, I convert the art to the size I will color it at, the print size so the actual size of the printing (for a comic book cover 7" x 10.6") and 600dpi.


with the "Nearest Neighbor" Setting opted.


Step 10

Save with new file name FILE_LINEART.tif and ...


with these boxes checked!

VOILA, time to color (or set up for coloring more appropriately).

Comprende?

NOW - you don't need to do this - you can save A LOT of time by scanning in Black and White (Bitmap) - however, Rachel has so many fine lines these simply get lost. So if you have a clean graphic line - don't go to all this trouble... it ain't worth it.

In Part 3, 

COLORS

TD


Tuesday, February 21, 2017

Cyclops Inhumans Vs X-Men #4 Cover Step by Step Part 1 Pencils


Inhumans Vs X-Men #4 Variant Covers featuring Scott Summers Cyclops.

By Rachel Dodson and Me.

Out now from Marvel Comics.

Now for Part 1 of the Step by Step -


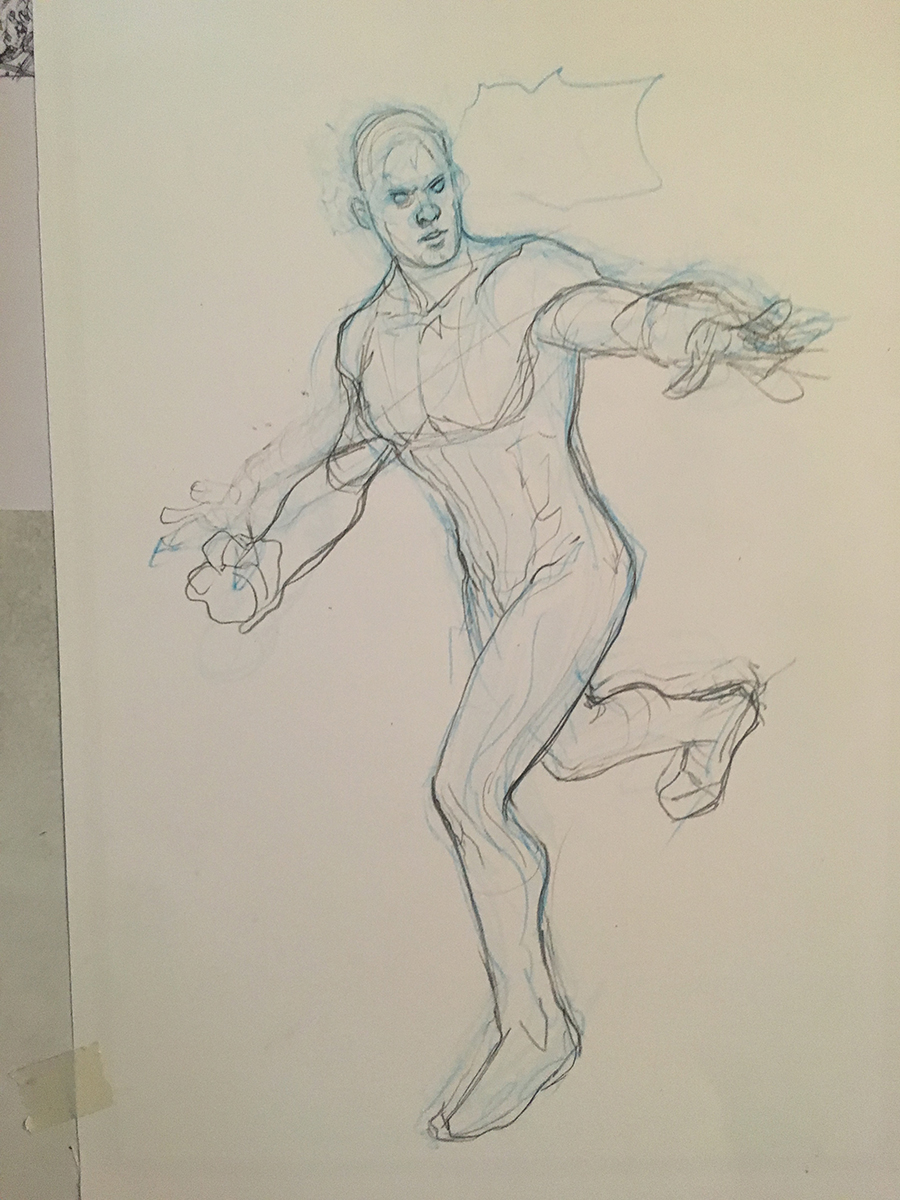
PENCILS


COVER SKETCH

The cover concept I sent into Marvel Comics Editors Wil Moss and Daniel Ketchum for approval.

Roughs were drawn at 2" x 3" in my sketchbook using Warm Grey Copics then colored in Photoshop CS3.


Initial Pencils

Drawn in Light Blue on 12" x 18" Bristol Board 

Quickly roughed in the drawing making sure the composition still help.
I printed out my rough in light blue on the paper to ensure the composition was positioned correctly.


Erase and refine again.


PENCIL DEMO

HB lead on 12" x 18" Bristol Board 


And now the figure is nailed down


Finalize hand positions


Heading toward finishes here.


FINAL PENCILS


Pencil Detail

Next time, 

PART 2


TD

Thursday, February 16, 2017

Inhumans Vs X-Men 1-4 Covers


Here's the first FOUR variants that we've done. 

Out in stores now from Marvel Comics!

See the Step by Step making of the covers below!

TD

Sunday, February 5, 2017

Inhumans Vs X-Men #4 Variant Cover out this week!


 Inhumans vs X-Men #4, written by Charles Soule (Uncanny Inhumans), Jeff Lemire (Extraordinary X-Men) and drawn by Leinil Yu (Secret Invasion).

Step by Step coming soon...

TD

Thursday, September 15, 2016

Cyclops Convention Sketch Step by Step

Here's a look at how I did this Scott Summers sketch at the Rose City Comic Con, Sept 11, 2016.


Drawn on a blank cover.

Col Erase Scarlet Red Pencil

Pigma Micron 03 Pen


Copic Warm Grey 1, 2, 4 and 6 Marker

Pitt S Pen


Copic Warm Grey  8 Marker

Pitt F Black Pen


Detail

TD


Friday, May 23, 2014

3 X-Men books out this week!

Wow, must be a movie coming out or something … 2 covers and 1 X-Men collection coming out this week from Rachel and I.


X-MEN MUERTAS


X-MEN 14 Cover


UNCANNY X-MEN 21 Variant Cover

You can find this comic at your local comic book retailer


And digitally at Comixology 

https://www.comixology.com/X-Men-2013-14/digital-comic/100173


TD

Thursday, May 22, 2014

Uncanny X-Men 21 Variant Cover - Step by Step - PART 2 Color

Here's a look behind the making of the Variant Cover to Uncanny X-Men #21 featuring Emma Frost, Magik, and Cyclops
(out in stores now from Marvel Comics by Brian Bendis and Chris Bachalo and Tim Townsend).

After scanning and cleaning Rachel Dodson's inks in Photoshop - we move on to 

THE COLORS


The first stage of coloring is to have the art "flatted".

Flatting allows me to choose an area to color at any point throughout the coloring process - which is really helpful when you've almost finished coloring the art and realize the sky is supposed to blue not green etc.


I go in and adjust and correct the flats - especially for things like amount of blacks in color and a lot of the time I just lay a flat color over the whole thing like an orange or a blue to make it a harmonized color palette.


My initial rough in of the colors, done in Photoshop CS3 with a Wacom Intuos Graphics Tablet. 


Revising colors and add in the red "X"


I begin turning the black lineart into color lineart and special fx.


Finally I redden up the X.


Detail fo Magik.


And the actual printed comic...

You can find this comic at your local comic book retailer


And digitally at Comixology 


Enjoy!

TD